Selected data captured by your forms can be anonymized when exported. This is helpful when handling sensitive personal data as required by various standards like GDPR or HIPPA. Workflows can be configured such that authorized destinations receive valid data while un-authorized destinations will receive an anonymized version of the same data.
An additional measure allows fields to be prevented from appearing at all in exported data.
Handling Personal Data
When creating forms, you can mark fields as IS PERSONAL DATA. When this flag has been set on a field, the data contained for that field can be anonymized on export. How this works is dependent on other settings and how the data is exported.
Protecting Sensitive Data
Protecting sensitive data is a 2-step process:
- Flag fields as Is Personal Data
- Configure the Connector to Anonymize Personal Data
Flagging Fields as Personal Data
Fields that contain sensitive data must be flagged as Is Personal Data.
By itself, setting this flag does not grant or imply additional security, protection, and privacy of data. Data is still captured and uploaded to the Platform and without additional settings made within your forms and/or Connectors, can be exported.
To flag a field as Is Personal Data:
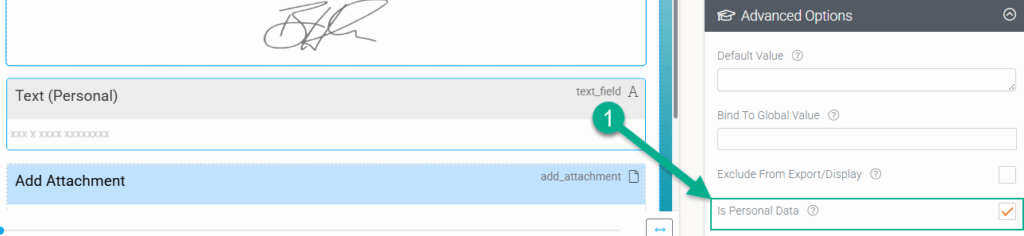
- Select the field
- Check the checkbox IS PERSONAL DATA in the field’s Advanced Options
Configuring Connectors
Data can leave the platform in a number of ways. You might send an email to several recipients, or via Connectors to destinations like Google Spreadsheets. You should consider how each export point is configured to ensure sensitive data is kept private.
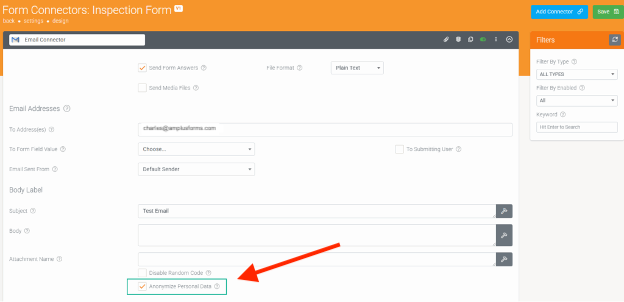
Each connector has a setting that will enable the anonymization of fields marked as Personal Data. The example is for an email connector; each connector will have the same settings. To make the setting:
- Navigate to the form’s Connectors page
Either on the screens page when hovering over a screen, click the connect link, or when on a form’s design page, click the connectors link top-left under the page’s title. - Add a new Connector or select an existing one.
For more information, see the articles on Form Connectors - Give it a name that identifies it as being protected for easier form management
- Locate the checkbox Anonymize Personal Data and check it
- Click Save
Setting up multiple Connectors lets you send data to specific destinations, anonymized or not. For example, you could set up one email connector with recipients for anonymized data and a second with a list of people who can view the original data.
Result
Forms that are correctly protected will anonymize the set fields by replacing the data with meaningless characters. In the example below:
- Unprotected fields with all data readable
- Protected fields with anonymized data
Data that is destined for connectors like external data sources or other platforms will also have the anonymized data written for protected fields.

Excluding Sensitive Data from Export/Display
Some data must remain restricted to the extent of not being visible in any export or display. Marking fields as EXCLUDE FROM EXPORT/DISPLAY prevents them from appearing in any data exports, including PDF, CSV, or export via connectors, etc. These fields will still be available in Data Entry views like Feed, Table, or Map.
Flag a Field as Excluded
To flag a field as EXCLUDE FROM EXPORT/DISPLAY:
- Select the field
- Check the checkbox EXCLUDE FROM EXPORT/DISPLAY in the field’s Advanced Options

Result
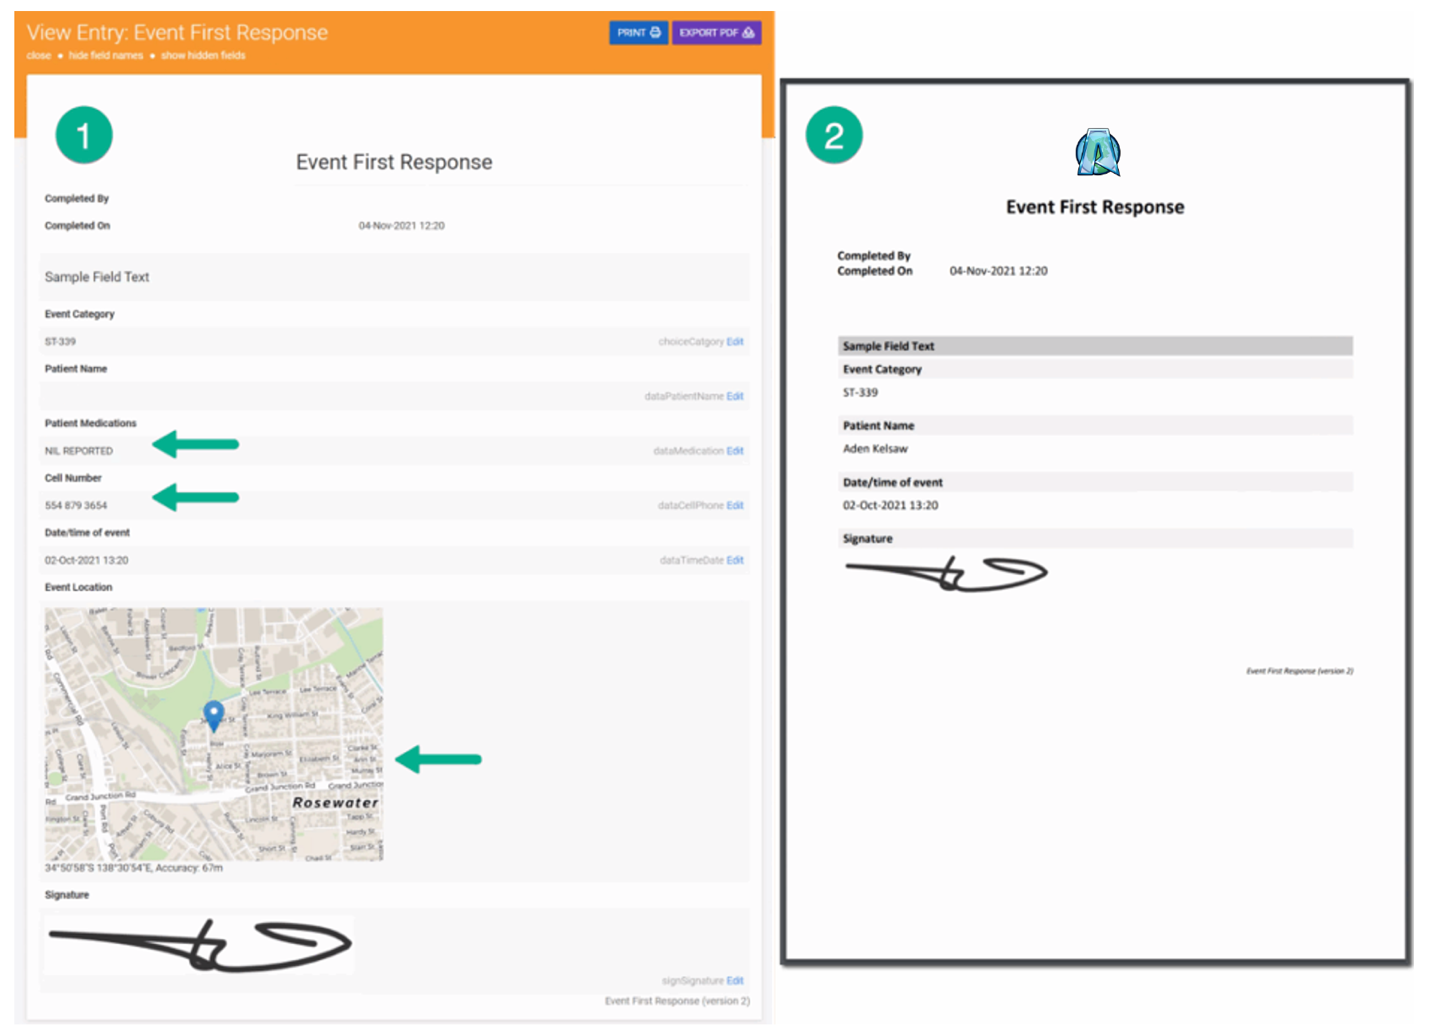
Fields marked as EXCLUDE FROM EXPORT/DISPLAY will appear as follows within the platform and once exported:
- A form with some fields set as Excluded – indicated by the arrows. Note that all data is visible
- The same form entry after being exported using the Generic PDF export.
The fields indicated in (1) are excluded from the export.