
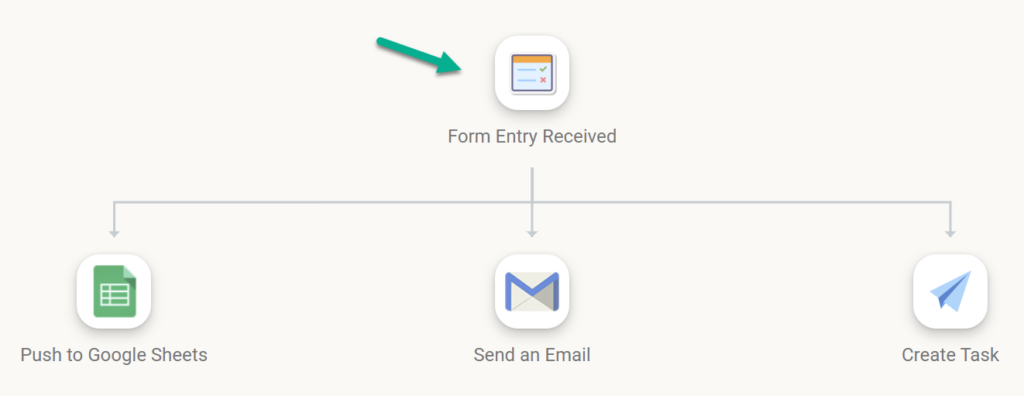
This guide will walk you through building a “Triple-Threat” Sync triggered from a Form Entry. We will start with a basic data push, add a communication layer, and finish with a logic-based task.

Best Practices for Testing
Testing is the most important part of building a Sync. Don’t wait until the end to see if it works!
Evaluating Formulas+
Confirming Action Outputs+
The “Run Now” Test+

The Trigger – Form Entry Received
The Trigger is the “Event” that wakes up your Sync. Before adding any actions, you must confirm the platform is receiving the form data correctly.
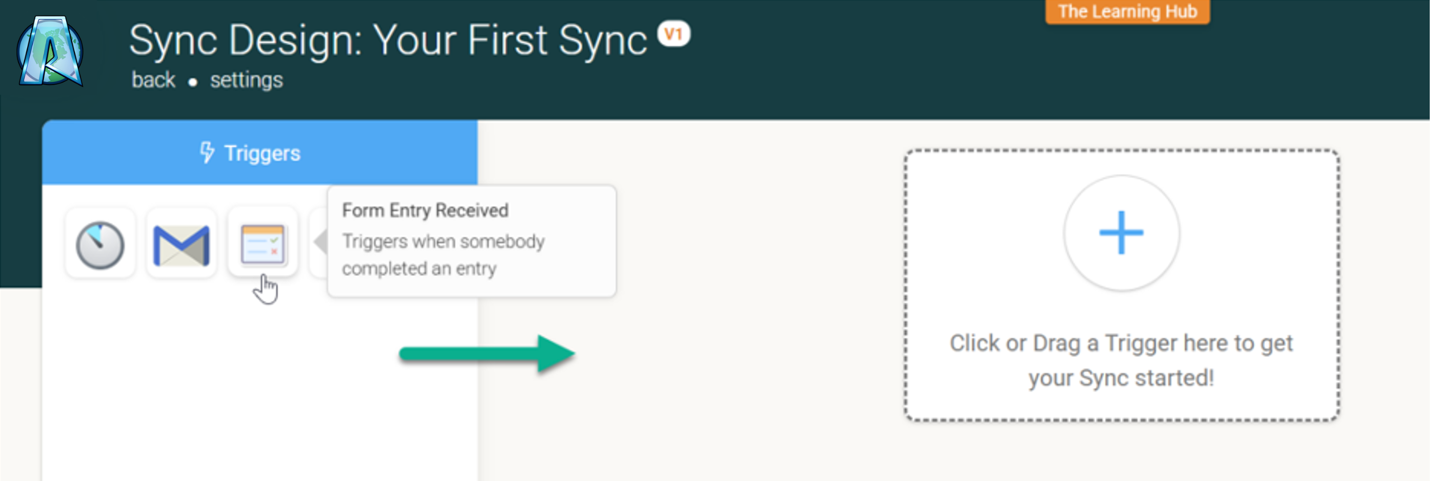
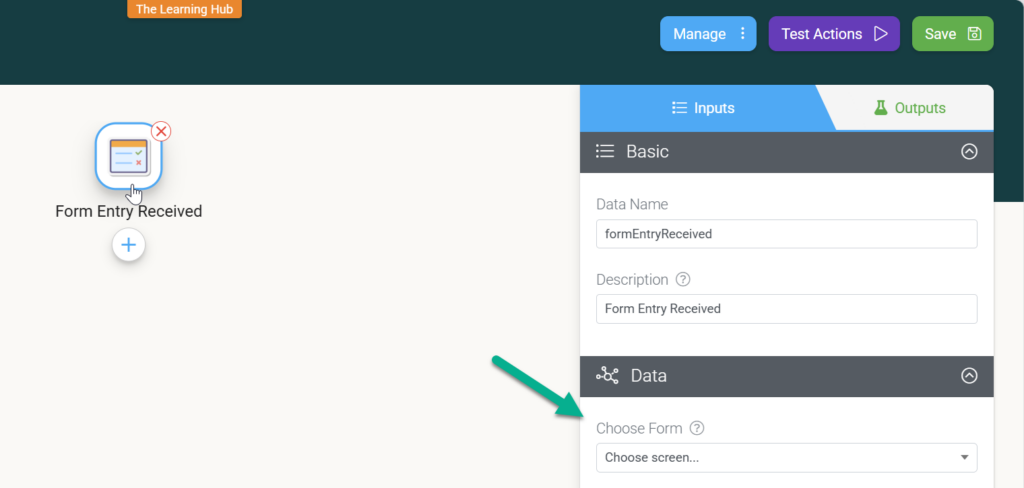
- Select your Trigger: Choose Form Entry Received. Select the specific form you want to monitor.
Add the Trigger
Configure the Trigger
Component | Configuration | Testing Strategy |
Trigger | Form Entry Received | The Initial Payload: Click Test Trigger (or the play icon on the trigger). Look at the Output on the right. Ensure you see FormEntryRichwith your actual form fields populated. |
Source | Select your specific “Inspection” or “Lead” form. | Data Check: If fields like {{Values.Risk}} are empty in the test output, submit a fresh entry on the actual form to refresh the cache. |

Action 1 – Push to Google Sheets
This action maps your form data into a row format for external storage.
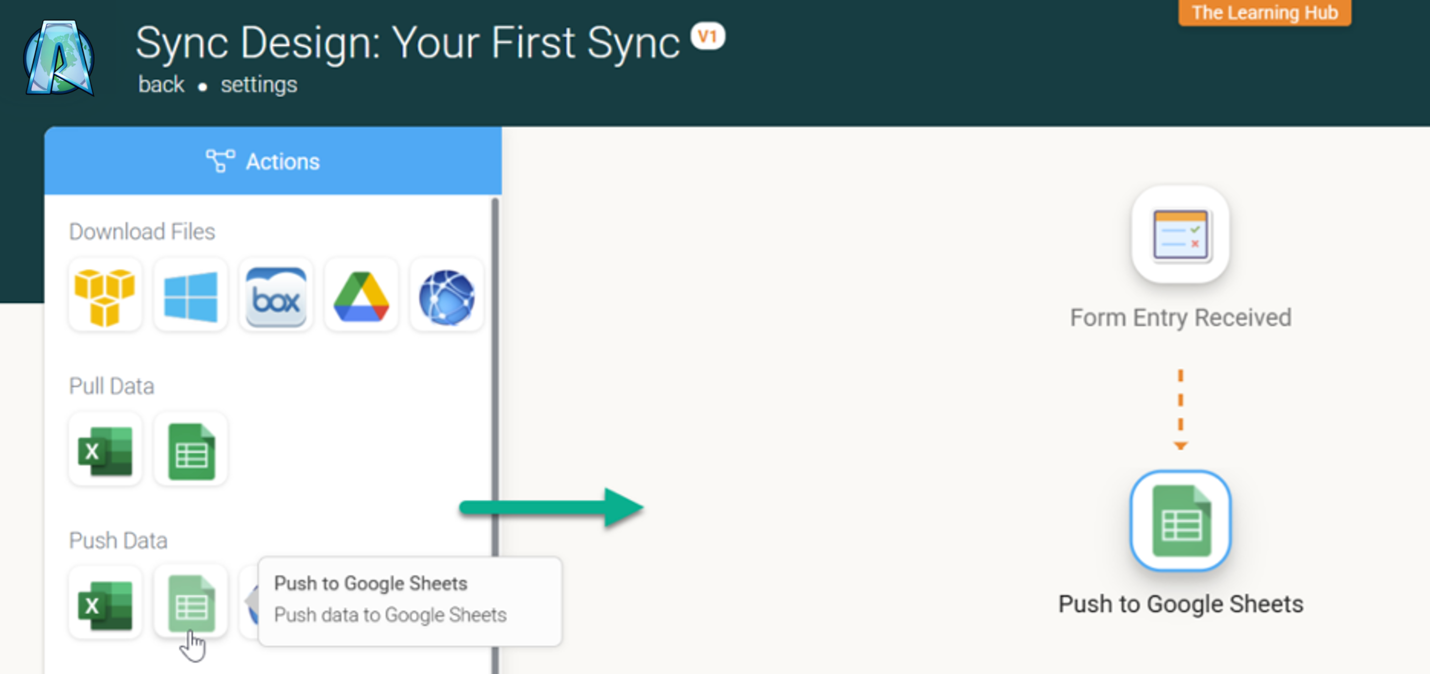
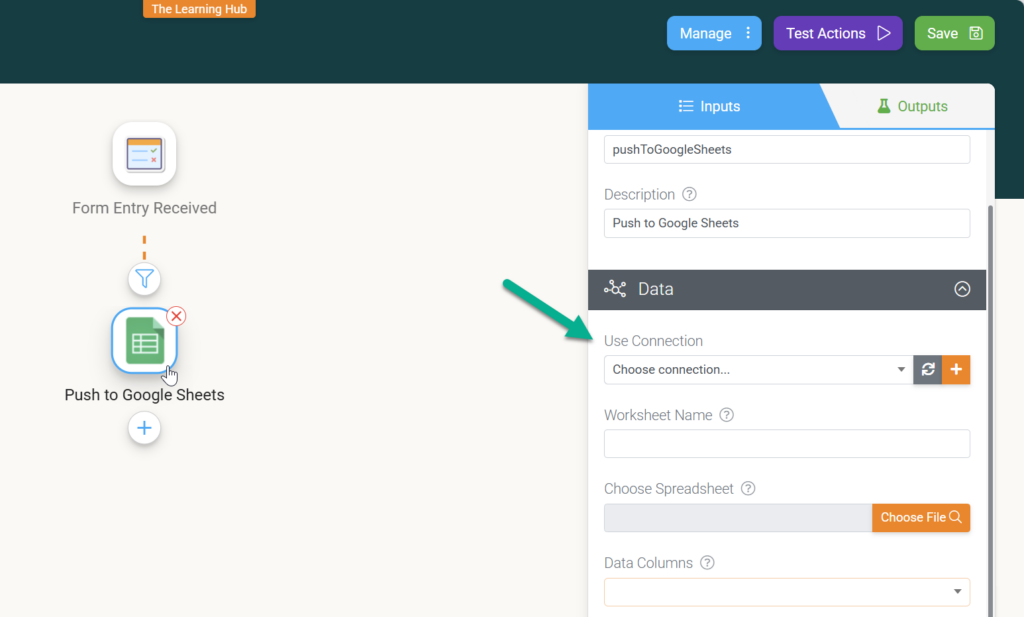
- Add an Action: Click the + icon and select Push Data > Google Sheets.
- Map the Rows: Connect your Google account and select your Spreadsheet/Sheet.
- In the Columns section, click the {{ }} icon.
- Navigate through the JSON Path dropdown:
FormEntryRich > Values > [Your Field Name]. - Repeat this for every column (Name, Date, Risk Level, etc.).
- Map the Rows: Connect your Google account and select your Spreadsheet/Sheet.
- In the Columns section, click the {{ }} icon.
- Navigate through the JSON Path dropdown:
FormEntryRich > Values > [Your Field Name]. - Repeat this for every column (Name, Date, Risk Level, etc.).
Add the Action
Configure the Action
Component | Configuration | Testing Strategy |
Action | Push Data > Google Sheets | Path Validation: Use the Green Play Button next to your mapping formulas (e.g., {{trigger:Values.Name}}). It should resolve to a real name, not null. |
Mapping | Connect your sheet and map Columns A, B, and C to your Form Values. | The “Run Now” Test: Click Test Actions > Run Now (Top Right). Check your actual Google Sheet—a new row should appear instantly. |

Action 2 – Send an Email
This step ensures your team is notified immediately when a form is submitted. We use JSON paths to make the email dynamic.
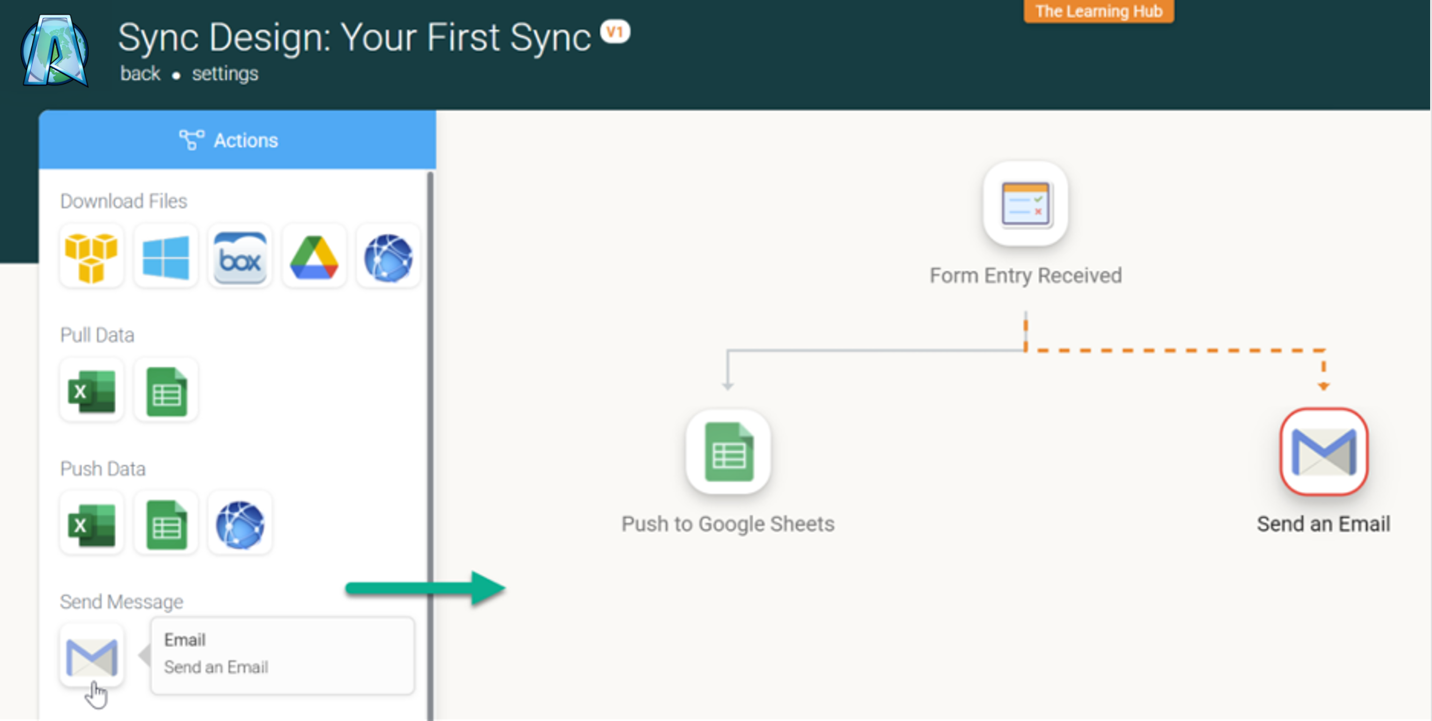
- Add an Action: Click the + below your Google Sheets action and select Send Message > Email.
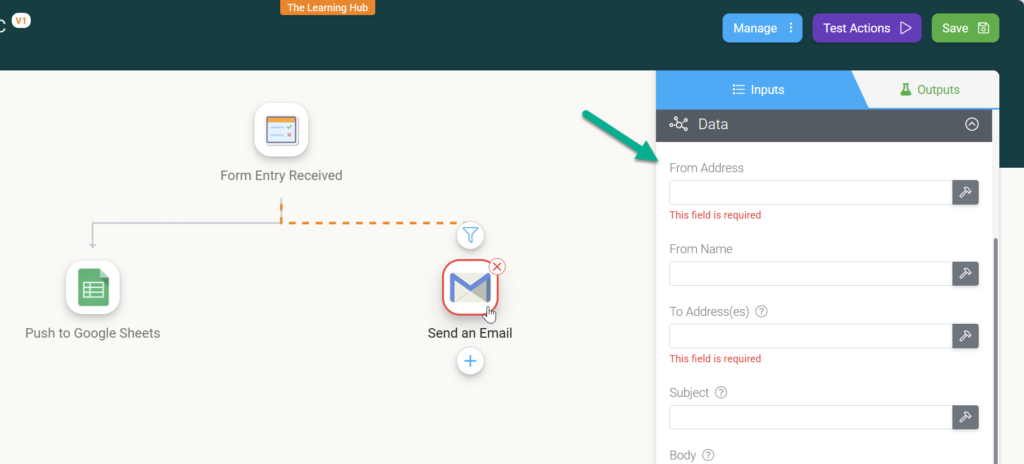
- Draft the Template:
- To: Type a static email or map the Submitter Email from the trigger metadata.
- Subject: Type “New Submission from {{trigger:Values.Name}}“.
- Body: Use the text builder to summarize the entry.
Add the Action
Configure the Action
Component | Configuration | Testing Strategy |
Action | Send Message > Email | Visual Preview: Use the Green Play Button in the Email Body builder. This confirms that your text and data tags blend together seamlessly. |
Mapping | To:{{trigger:Metadata.SubmitterEmail}} | Output Property: After running a test, check the Action Output on the right. It should show a “Success” status and a preview of the sent metadata. |

Action 3 – Create Task
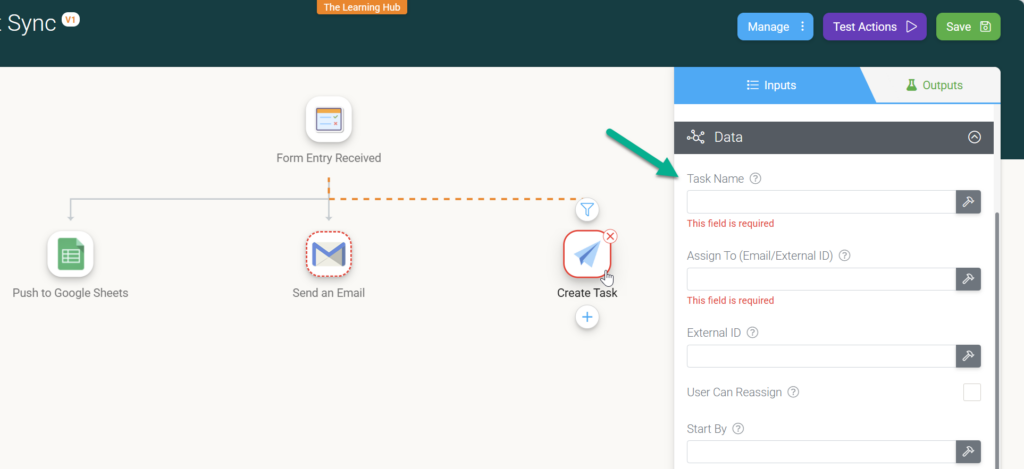
This is the “Advanced” step where the Sync makes a decision: only create a task if the risk is high.
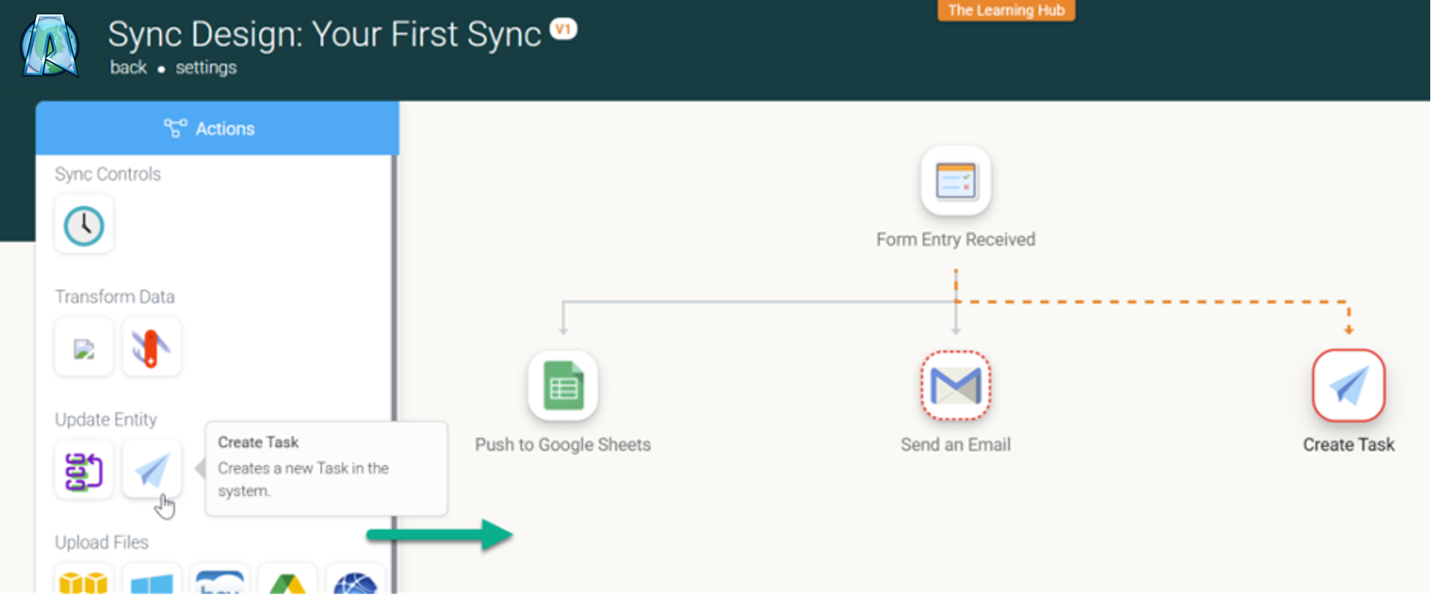
- Add an Action: Select Update Entity > Create Task.
- Add a Filter: Before configuring the task, click the Filter/Logic tab on the action.
- Rule: {{trigger:Values.Risk}} EQUALS High.
- Configure the Task:
- Subject: “Urgent: High Risk detected at {{trigger:Values.Location}}“.
- Description: Map the specific details from the form so the technician has the context they need immediately.
Add the Action
Configure the Action
Component | Configuration | Testing Strategy |
Action | Update Entity > Create Task | Logic Check: If your test data has Risk = Low, the test should show a Red Iconindicating “Condition Not Met.” This proves your filter is working! |
Filter | Field:{{trigger:Values.Risk}} | Path Discovery: If Risk isn’t in the “Choose JSON path” dropdown, manually type the path or copy/paste it from the Trigger Output panel on the right. |

Possibilities & Next Steps
Now that you’ve mastered the basics, consider how you can expand:
- Add a Delay: Wait 24 hours before sending a follow-up email.
- Generate a PDF: Use the Generate Document action to turn that form entry into a professional inspection report before uploading it to Google Drive.